🔧 Revive Your iPad with Confidence!
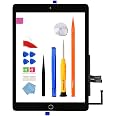
The A1893 A1954 Screen Replacement Kit is designed specifically for the iPad 6 (6th Gen) 9.7 inch, providing a complete solution for screen repair. This kit includes a high-quality digitizer touch glass, essential repair tools, and a detailed video guide to ensure a smooth installation process. While it does not support Touch ID, users can easily transfer their original home button to retain its functionality. Each screen is thoroughly tested for quality assurance, making it a reliable choice for DIY repairs.
R**S
Very appropriate customer service and works very well when installed properly!
I have done about 6-7 of these screen/digitizer replacements, and with the kids habitual damaging of the IPADs, these are very economical way to keep them fresh and usable! Any reasonable issues, they replace without hesitation! Be sure to follow the 6 minute install guide in-step, and you will have no issues become a borderline IPAD replacement pro. I will continue to purchase these as my children continue to damage my Ipads.
A**E
Great ipad
Great product and great vendor. Will definitely buy again from here
R**N
touchscreen not working normally after install
The media could not be loaded. This replacement screen was a nightmare to install. Firstly, the printed directions were absolutely horrible. They were vague at best. I had to watch a video from a youtuber to get it installed properly. There was broken glass everywhere and the suction cup was absolutely useless. Also, the tools to separate the broken glass from the chassis did not work at all. I used a razor blade to separate the broken screen from the ipad. I made sure not to cut any cables as shown in the youtube video I watched, which was excellent by the way. Unfortunately, I lost home functionality mainly due to my inexperience as I broke the zif connector for the home button cable, but also because the printed directions didn't explain AT ALL which way the zif connector was hinged. Anyway, I could live with that if everything else worked fine. The adhesive tape does NOT hold. I didn't try the included glue because there were NO instructions on how to install it and I didn't want to risk getting glue everywhere. The worst part is this, there is a horizontal band across my ipad that no longer registers touch input. I included a video showing this. This is not acceptable! Do NOT buy this! You'd be better off paying a pro to replace a broken screen because at least you get a warranty for a couple of months!
M**H
works but.....
We watched the video because there are no instructions in the package. The video is edited to show clips of only some parts of the process; the video of how to remove the old screen is a joke. Like other reviewers, we had to shatter the old screen and pick it out piece by piece - it took over an hour, and was hazardous.Other parts of the video simply aren't there - including how the ipad was taken apart, after the screen was removed, where hidden screws were, etc. Eventually, we got it all together and lo and behold it worked . The kid working alongside said it was a great learning experience, though we expected it would fail in the end.Time is money and based on the amount of time this took we would've saved money with a repair shop - but, it was interesting (if frustrating) and turned into a learning opportunity and a new, working screen on an ipad.PS - tons of extra parts in the kit with zero explanation or appearance in the video. I have no idea what they are or why.
T**Y
UPDATE** Well, should have listened to the reviewers that had issues…vs
Update**I decided to try again and did an exchange, took a few days and I replaced the broken replacement and line behold it works as intended. If you don’t mind possibly having to replace the replacement and do the work twice it will eventually work. With that said I am changing it from a 1 star to a 4 star as I did have to replace the replacement but it was all free and the 2nd worked.Orig**The screen seemed like it would work without issues until I tried typing in a password and an invisible line in the middle of the screen is preventing that from working. I got a painting app to see if there is a problem aaaaannnnddd there is. If I could give 0 stars I would.As you can see in the picture there is a very defined broken line in the digitizer.Would NOT recommend this replacement to anyone.
L**5
Replaced my old one for 2 weeks now, works like new
Installation is very simple. The most difficult part is to pry the old glass off. It took me over half an hour, and I had to shatter the old glass totally to remove it. I bought this one with the home button to be safe. After I finish, I realized that I should hv bought the ones without it. No wonder most people are selling them with no home button. I resused the old one, so that my credentials are kept. It's very easy to get off and stick to the new one.In general, you can follow the instructions in the package. One tricky part is the longest flat wire that goes from glass to the pad. It's glued on by a tiny tape. All other connectors are clipped on, so you can pry them open withthe pastic pryer came in the kit, but for this one, u need to peel off the tape, and pull it out. prying will bend the connectors.After you are done, before you glue the glass back to make it permanant, it is suggested that you test if it works.The LCD may not light up. Don't panic, the pad needs to be hard restarted. push and hold both power and home button for 10 sec, and it'll restart to light the LCD up.Aviold my pitfalls listed above, and good luck, u may finish in a hour.
J**B
Not product's fault of improperly installed - 5-star seller was VERY responsive to issue
First of all, this screen (digitizer) replacement is on-par with every other I have performed, not for beginners but easily doable for someone who is handy. There are plenty of videos on YouTube describing this repair, but none I have found emphasize the importance of properly folding the ribbon cable. The attached photo illustrates what will result if the ribbon cable rubs the metal shell (case) when placing the new digitizer onto the case in the final step. The case has a sharp edge leftover from the manufacturing process that can scrape the (very thin) insulation off the cable, which results in grounding those signals and making either vertical or horizontal strips on the new display which will not detect touch.When the new ribbon cables are applied to the new digitizer, it is important to fold them tightly to avoid a bulge that will be crushed onto the case when folding the new digitizer into place. Second, when placing the digitizer onto the case in the final step, hold it a few mm above the case on the cable side with a plastic scraper and orient the opposite side FIRST, then lower the cable side into it's final position so it cannot shift and scrape the insulation off the cable.Seller was responsive and immediately provided a solution, highly recommend purchasing a digitizer here.
Trustpilot
3 days ago
2 months ago