


🖥️ Elevate your rack game with precision and power!
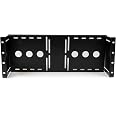
The StarTech.com 4U Universal VESA LCD Monitor Mounting Bracket is a robust, cold-pressed steel solution designed for 19-inch racks or cabinets. It supports 75mm and 100mm VESA LCD panels, offers adjustable mounting depth for optimal fit, and complies with TAA standards for government procurement. Built for IT professionals, it ensures durability, versatility, and lifetime technical support.


| Brand Name | StarTech |
| Item Weight | 3.63 pounds |
| Product Dimensions | 4.5 x 19 x 7 inches |
| Item model number | RKLCDBK |
| Is Discontinued By Manufacturer | No |
| Color Name | Black |
| Specification Met | No, certified frustration-free |
| Item display height | 17.8 centimeters |
C**A
Made in Canada? Nice hardware. Self explanatory
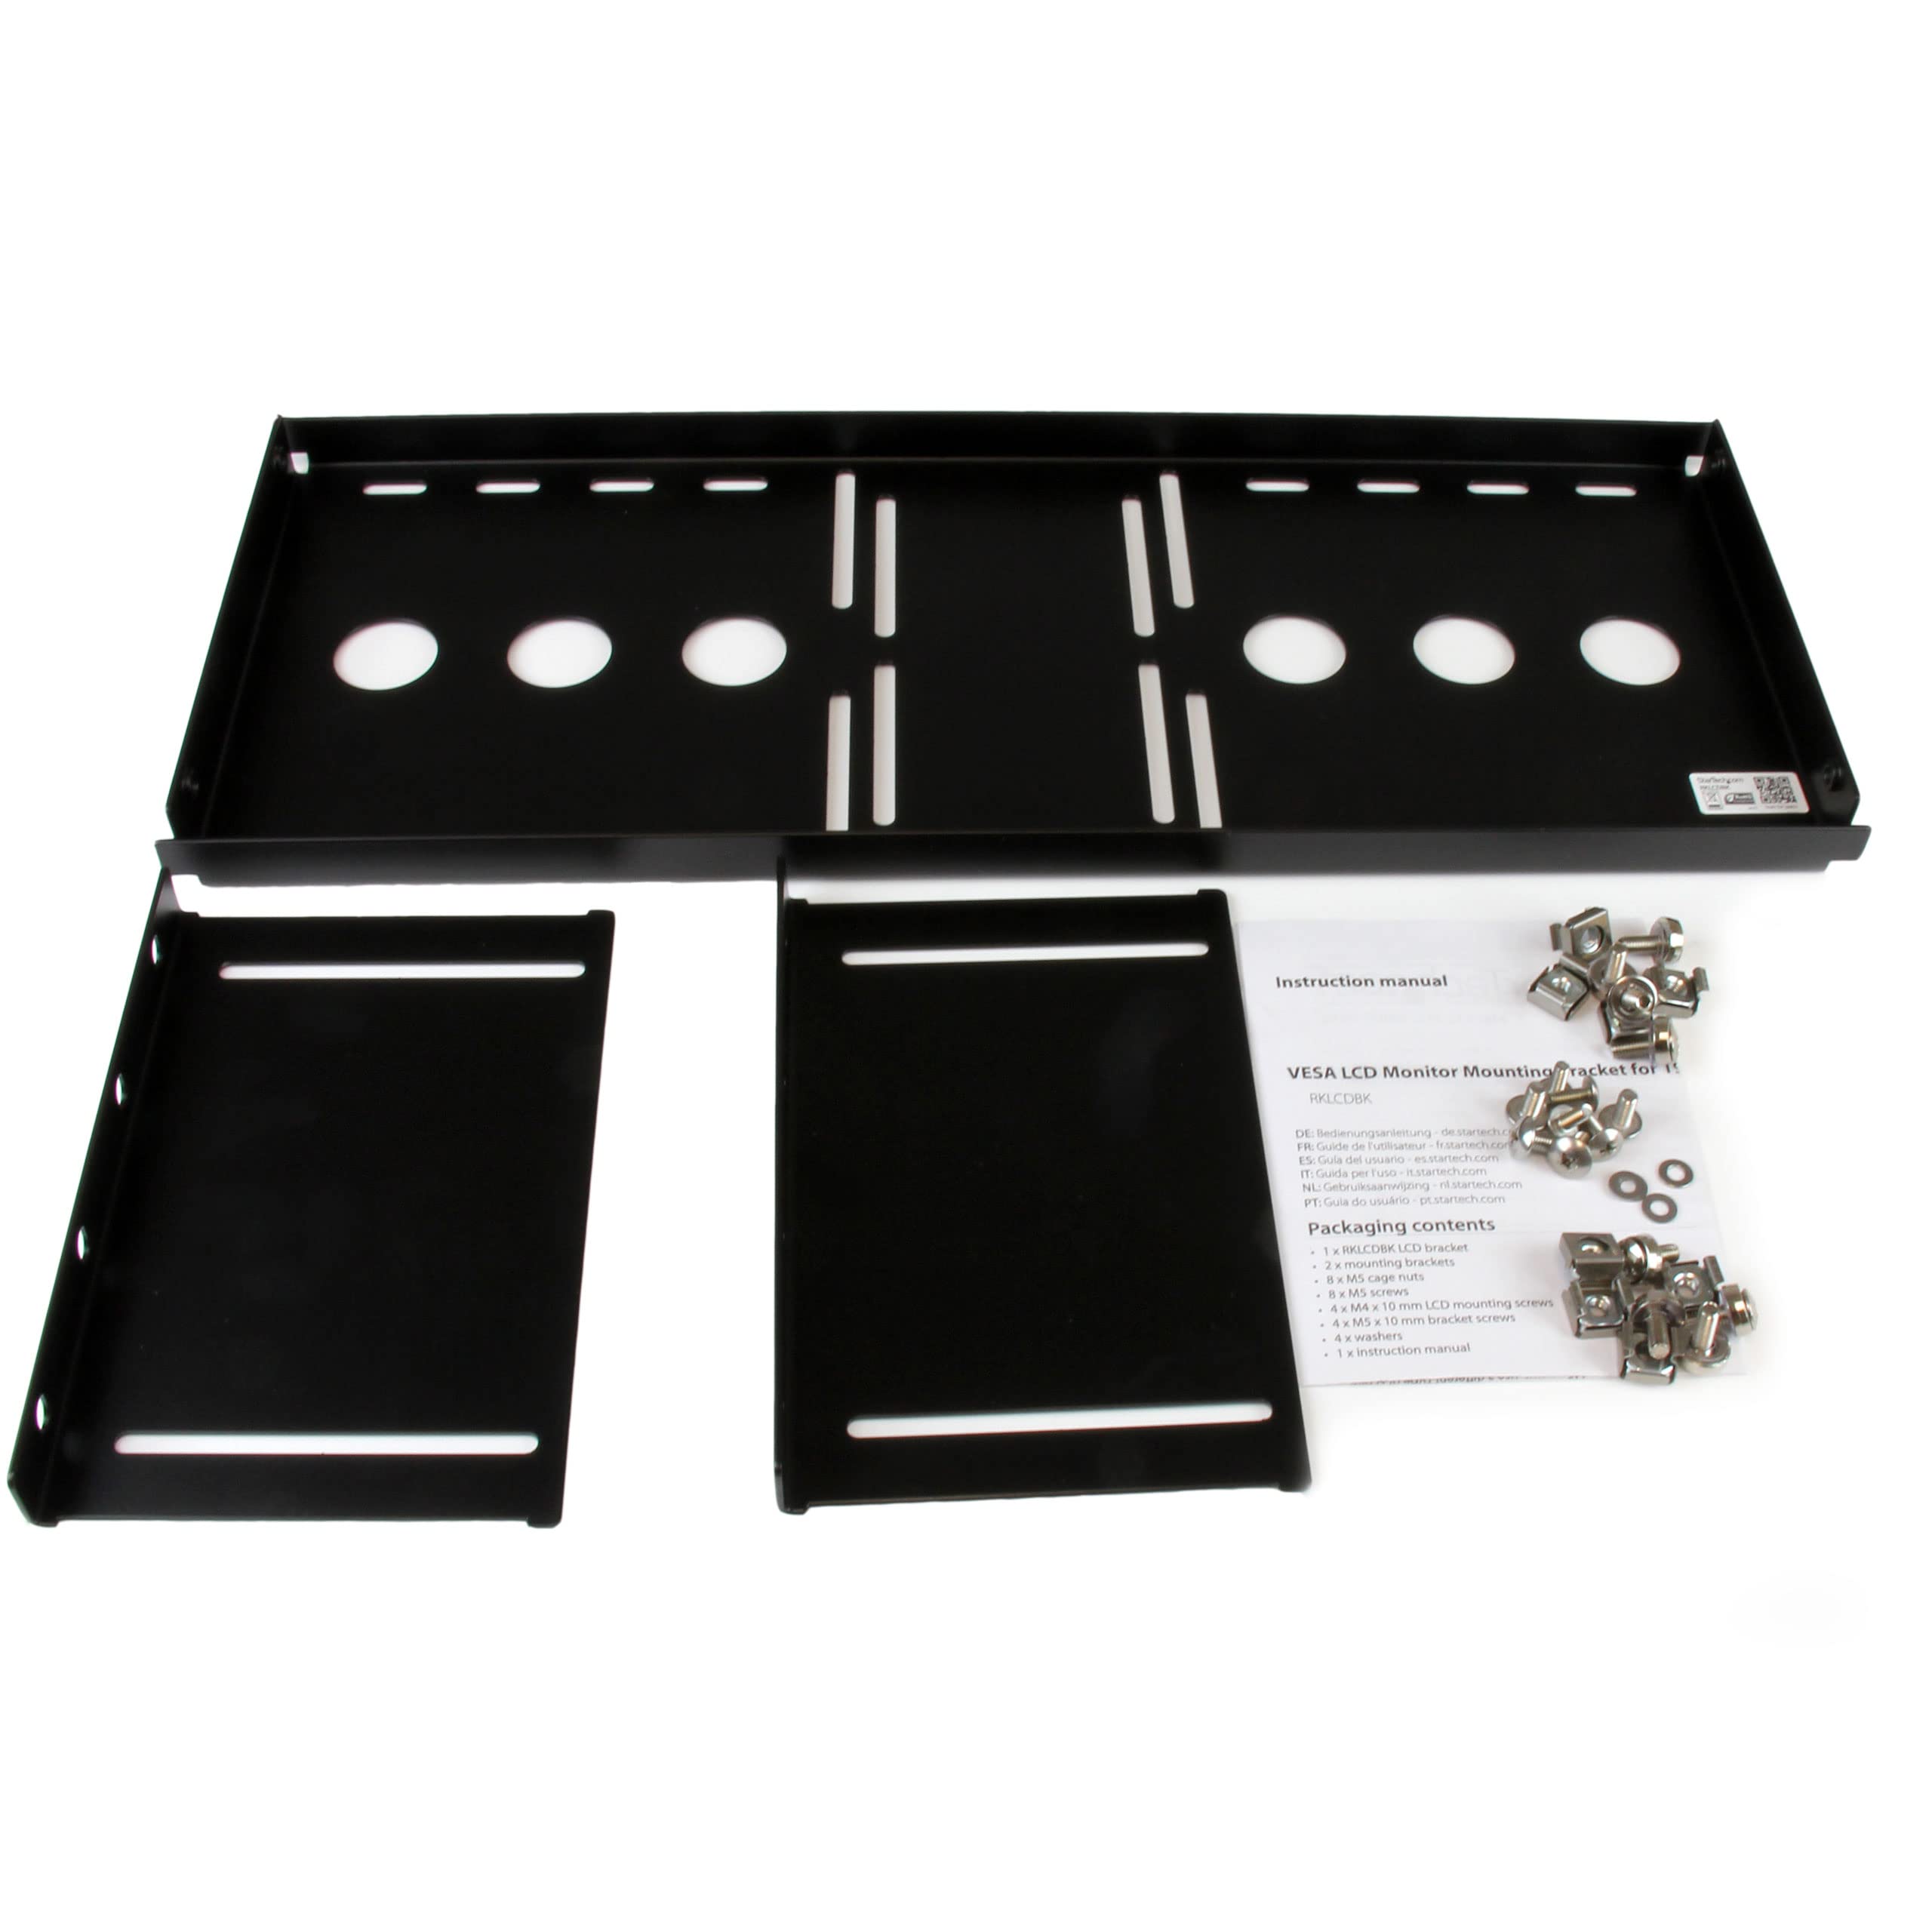
It goes without saying that reviews are purely subjective and never going to be universally agreeable. I am not clear about the criticism about the "hardware"-be it poor quality or confusing at to its placement. This is not a complicated product. To understand this review, it's getting the "terminology" correct/comprehensible for others to read. This kit is as simple as it gets. The components: back plate, side arms (one for the left and one for the right rack tower attachment) and 3 types of screws (4 to attach arms to back plate, 4 to attach back plate to monitor and 8-although not required to use all 8-to mount the assembled bracket to the rack. Note, first determine if you will be able to attached the bracket after the monitor has been attached to it or if you first need to attach the bracket to the server rack and then attach the monitor to the bracket. Either way, it's a very simple process to screw the monitor to the backing plate. In my case, having the bracket and monitor attached first, I wasn't able to mount the bracket using the rear posts of my server rack. Either way, it's beneficial to attach the monitor to the back plate and then line it up/press it up against your server rack to determine the final position you'd like the monitor to protrude outward or inward of the rack posts. Once you know this, you can tighten down the side arm screws into their final position. If you pre-attach the bracket and then mount it to the server rack, you may not have access to the screws. Again, this just allows and 1" of inward/outward positioning of the monitor after its attached to the backing plate. It makes sense when you're assembling it. I found the 3 types of screws, clearly marked and bagged accordingly, to be of good quality. Also, the threaded back plate attachment points were very sturdy. No issue whatsoever in terms of cross threading or stripping. [Pro tip: any time a screw is inserted or re-inserted after being removed from it's original location-particularly when it's anchored into a different material than it is made like a self anchoring metal screw into plastic or sheet metal; first insert the screw with light pressure and slowly turn backwards ("counterclockwise", in other words, the opposite direction of that to tighten the screw) until you feel a little "click" and sink. This "click" is the sound and feel of the screw naturally being re-aligned with the thread pattern. This little trick will prevent 90% of cross-threading mishaps because the screw will naturally realign with the particular thread pattern that has already been "forged" between the materials whether metal to metal or metal to plastic, etc on self-anchoring screws in particular.] The rack mounting hardware in particular is great, it's a complete mounting set of M5 sized (some rack hardware is M6) consisting of a "pass through" screw, a tub washer and a spinner/grip nut. You don't have to use the nut if the threads on your server rack are substantial and no major load bearing requirements. However, I recommend to use the seated washer as it makes for a professional look and it insulates the metal to metal contact and reduces vibration. The good thing about having M5 "universal" mounting screws is that they will work with larger mounting holes as long as you use the supplied nuts. Otherwise, you will have to bore out the holes in your rack rails to accommodate M6 screws and will be obligated to use nuts. Regardless, this mount is solid, heavy gauge metal and it allows for several mounting positions. I took a couple pics to capture how I used the rear post position and recessed the side arms to limit the depth (although it is difficult to see the side arm screws after the bracket is mounted) which keeps my monitor flush with the front rails of the rack. Again, STEP 1, pre-assembly of the frame (using 4 screws to attach the arms that thread directly into the back plate). Don't over tighten as you may want to adjust the final position of your monitor before you attach the bracket to the rack. I recognize that there are all levels of experience and skill when it comes to these types of products but I find it a bit harmful to a product/vendor to trash an item simply because you should've hired a trained monkey to do it for you. If nothing else, take the pro tip as my gift to pass along.
S**P
Adjustable depth and versatile vesa mount
Fit a 4K 32" monitor in my rack vertically. Sturdy, plenty strong for a large monitor Tight fit and PBP for two outputs, works great. Much cheaper than other rack mounted monitor solutions.
J**.
Works flawlessly
Excellent mounting bracket. I have this in the back of my 12U Gator rack for DJ work to hide the mess of wires, holding up an old Samsung SyncMaster 712N, which is actually a bit heavy. Still, it hasn't complained or bent in any way and I'm happy with my purchase.Solid bracket. I highly recommend this.One side note---I see some people have had problems with monitors with a curved back; I can't speak for that, as the Samsung SyncMaster 712N monitor I attached has a flat back. Nonetheless at least know that this has a good weight-bearing capacity.
S**R
The bottom line is that the variety of mounting options are great. The only issue I had was that I ...
This is very well made. What many others seem to be overlooking is that the side 'ears' need not be attached at their very last positions to the back bar. The design allows the user to install monitors that fit between the side rails at any depth ahead of or behind the rails (up to about 3" of variation. Obviously if you are using a monitor that is wider than the upright rails, you will want to install the monitor in front of the rails. This can be done with up to 3-4" of distance between the rails and back of the monitor. This extra distance may be helpful if you are wanting to tilt and swivel a monitor.The bottom line is that the variety of mounting options are great. The only issue I had was that I needed to obtain some 4mm screws to replace the VESA mount screws that I had as the ones that came with the monitor were a bit too short after placing the horizontal brace up against the monitor. (This need for 4mm screws though did introduce me to the most fantastic hardware store ever that was just around the corner from me and I'd never known of it. Worth every bit of trouble.)
D**N
Screw threads
Works but you better be ready to tap the threads since they paint over them during manufacturing. I snapped a screw off putting the side pieces on.
D**N
Good bracket if you have the right size monitor
This unit is 'OK'. It works as advertised, but there are some things to consider that I wish I had known before ordering. This unit is 7U tall. I have an Acer P206, 20" widescreen which is also 7U tall without the desk stand installed. Here's where I run into problems. First, the monitor is a bit wider than the rack, so it overhangs the rack's vertical posts about 1/2" on either side. This LCD mounting bracket is 3" deep. The tilt VESA mount that attaches to the back of the monitor and then mounts to the bracket is only about 1-1/4" tall. That means I need to use at least 2" standoffs between the monitor and the VESA mount or I need to get a smaller monitor that will fit into the bracket cavity. Even if I used the standoffs, I would have problems due to the wide monitor extending past the bracket's hinges. When I swing open the mounting bracket, the monitor would contact the vertical post and not allow the bracket to swing open more than a few inches.So my solution will be to change to a smaller monitor that will fit into the bracket cavity. Another measurement to keep in mind when choosing a monitor is that the width of the bracket cavity will allow a monitor with a maximum width of 16-3/4". That's not diagonal, that measuring straight across.
Trustpilot
2 months ago
2 days ago